Canadian Citizenship Photo Mistakes & Canadian Passport Photo Mistakes That Get Applications Rejected
Karen Vaisman is a professional photographer and Master Retouch Artist with over 30 years of experience in citizenship, passport, and headshot photography. She holds a BFA in Photography from Syracuse University and is a listed referral resource for the Embassy of Canada, with a zero-rejection record spanning three decades.

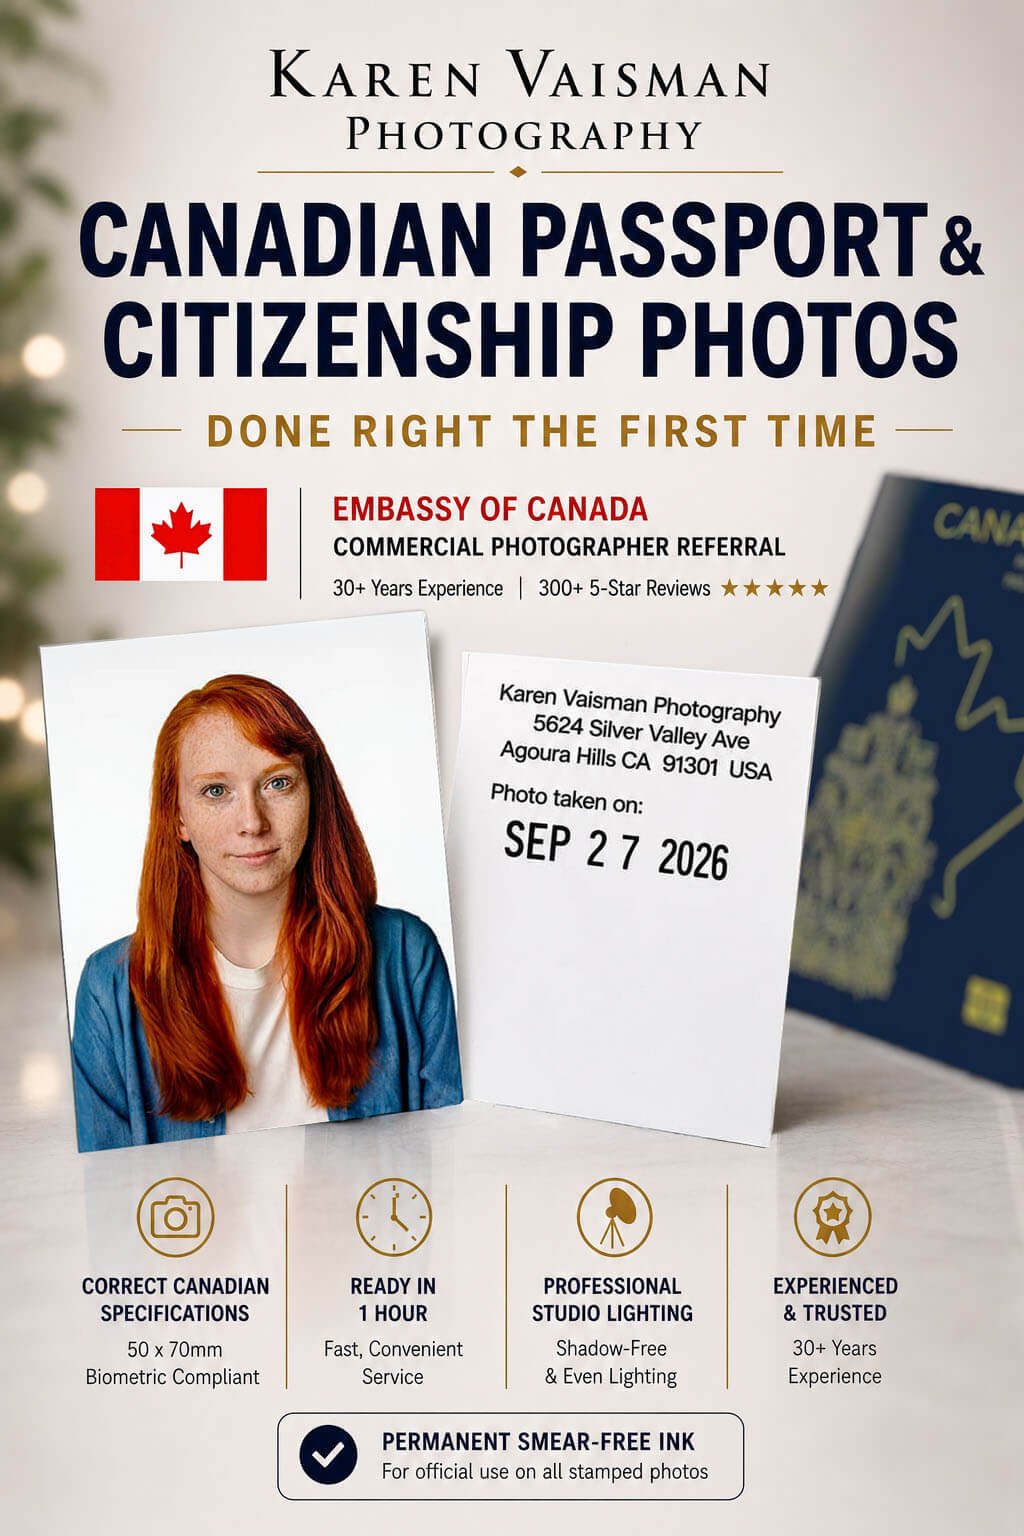
Karen Vaisman Photography - Experts in Canadian Passport and Citizenship Photos for 30+ years - 300+ 5-star reviews
Agoura Hills Photography Studio
Serving Los Angeles & Ventura County
Call (818) 991-7787
Karen answers her own phone
Book Your Canadian Photo Appointment →Key Takeaways
1. Know the Difference: Canadian citizenship and passport photos have separate specifications — using the wrong one is a common, avoidable rejection reason. See our Canadian Citizenship Photo Requirements and Canadian Passport Photo Requirements for the full specs on each.
2. Know What Goes on the Back: Your print order is two identical photos, and we stamp one with our commercial studio name, address and the date it was taken. The second can be stamped too — it's a bookable add-on. If your application asks you to write your own name on the back, ask us for a permanent-ink photo pen; ordinary ballpoint never dries on resin-coated photo paper and smears.
3. Know Your Format: Which format you need depends on how you apply, and the digital specs differ between citizenship and passport. On its online renewal page Canada says: “It's a good idea to get both a digital and a printed photo.” We supply prints, digital, or prints + digital.
4. Check the Official Requirements: Check the official Canada.ca requirements before your appointment.
5. Measure Head Size Precisely: Your face must measure between 31-36mm from chin to crown — this applies to adults and babies alike, and is checked, not estimated.
6. Handle Glasses Correctly: Glasses are allowed only if your eyes are clearly visible with no glare on the lenses; tinted lenses are never accepted, no exceptions.
7. Never Retouch a Government Photo: IRCC prohibits any digital alteration — including brightness, retouching, or filters. Every photo from our studio is the unaltered original.
Canadian Citizenship Photo Mistakes & Canadian Passport Photo Mistakes That Get Applications Rejected
Whether you're applying for Canadian citizenship or renewing a Canadian passport, your photo is one of the easiest parts of the application to get wrong. After 30+ years photographing citizenship and passport applicants in Agoura Hills, we've seen every version of a rejected photo. Here are the real mistakes that have cost real applicants weeks, sometimes months.
We're a listed referral resource for the Embassy of Canada — a status that exists specifically because we follow every one of these specifications to the letter, not just most of them. That's the standard behind everything below.
Requirements can vary depending on your exact application type, procedure, and whether you're applying online or on paper — this post covers the mistakes we see most often, but it's not a substitute for the specific instructions in your own application package. We always follow whatever your particular application requires, even when it differs from what's described here.
A note before you dive in: depending on how you apply, your application may call for printed photos or a digital photograph — and the digital specs differ between citizenship and passport. We supply either. Prints come as two identical photos with our commercial studio stamp on one; a digital order is a JPG sized and cropped to spec, with a text file carrying our studio name, address and the date it was taken, ready to upload alongside it. Check your own application for what it asks you to provide.
Passport: The Missing Stamp That Cost Someone Six Weeks — and Access to His Own Mother
A client who lives in Canada but works in the San Diego area found himself stuck in the U.S. when his passport was set to expire in under six months. He needed to renew it quickly — he has an elderly mother back home he needed to be able to reach.
He went to a retail photo counter for his photo. The employee told him that the stamp on the back is only required for children's passports. That's incorrect — it's required regardless of age. He submitted his application without it, and it was returned.
By the time the rejection came back, his passport had expired. He had to start his application completely over from scratch. He drove three hours, same day, to get a compliant photo done and re-file. Months later, he still hasn't been able to get back to see his mother.
This client was submitting a printed-photo renewal by mail, not an online renewal — online renewals use a different, digital process.
The lesson: we stamp every print order the same way, whatever the applicant’s age. If the person taking your photo tells you the stamp is only for children’s passports, that’s a red flag — get a second opinion before you submit anything.
Citizenship & Passport: Ordering the Wrong Format for How You're Actually Applying
This one trips people up on both sides, but in different ways. Which format you need depends entirely on how you’re applying — and having only one can leave you stuck if your route changes. On its online passport renewal page, Canada says: “It’s a good idea to get both a digital and a printed photo. This will give you the flexibility to apply online, by mail or in person.” If you’re applying for citizenship online, IRCC wants a single digital photo — JPEG format, at least 420×540 pixels, roughly 240 KB to 4 MB in size, saved directly from the camera with no compression or editing. If you’re applying on paper, you need two identical printed photos instead — no digital file required at all. Passport applicants have a similar split: renewing online requires a digital photo instead of prints, while applying in person or by mail requires prints instead of a digital file. But the pixel dimensions, size limits, and format differ between citizenship and passport digital specs, so a file built for one application type isn’t automatically correct for the other. Ordering the wrong format, or the wrong digital spec, for your specific application is an easy, avoidable mistake.
What we put on the back: two identical prints, with our commercial studio name, address and the date stamped on one of them. The second can be stamped too — it’s a bookable add-on. If your form asks you to add your own name, we’ll hand you a permanent-ink photo pen at the studio; ordinary pen ink sits on the surface of resin-coated photo paper and smears, and a smeared back is a rejection nobody sees coming.
The lesson: citizenship and passport have separate digital specs, so the two aren’t interchangeable. Check your application before you book, then book the option it asks for — prints, digital, or prints + digital. Whatever you book is what we supply, stamped and ready.
Featured Client Review
“I had a wonderful experience with Karen Vaisman Photography! I drove all the way from Orange County to see her, and it was absolutely worth the trip. Karen was incredibly meticulous and detail oriented, making sure my Canadian citizenship photos met all of the specific requirements. She was also friendly, patient, and highly professional throughout the entire process. Her attention to detail gave me complete confidence that everything was done correctly. I highly recommend Karen to anyone needing Canadian citizenship or other official photos!”
Read this review on YelpCitizenship & Passport: Rejected Three Times Over a Fraction of a Millimeter
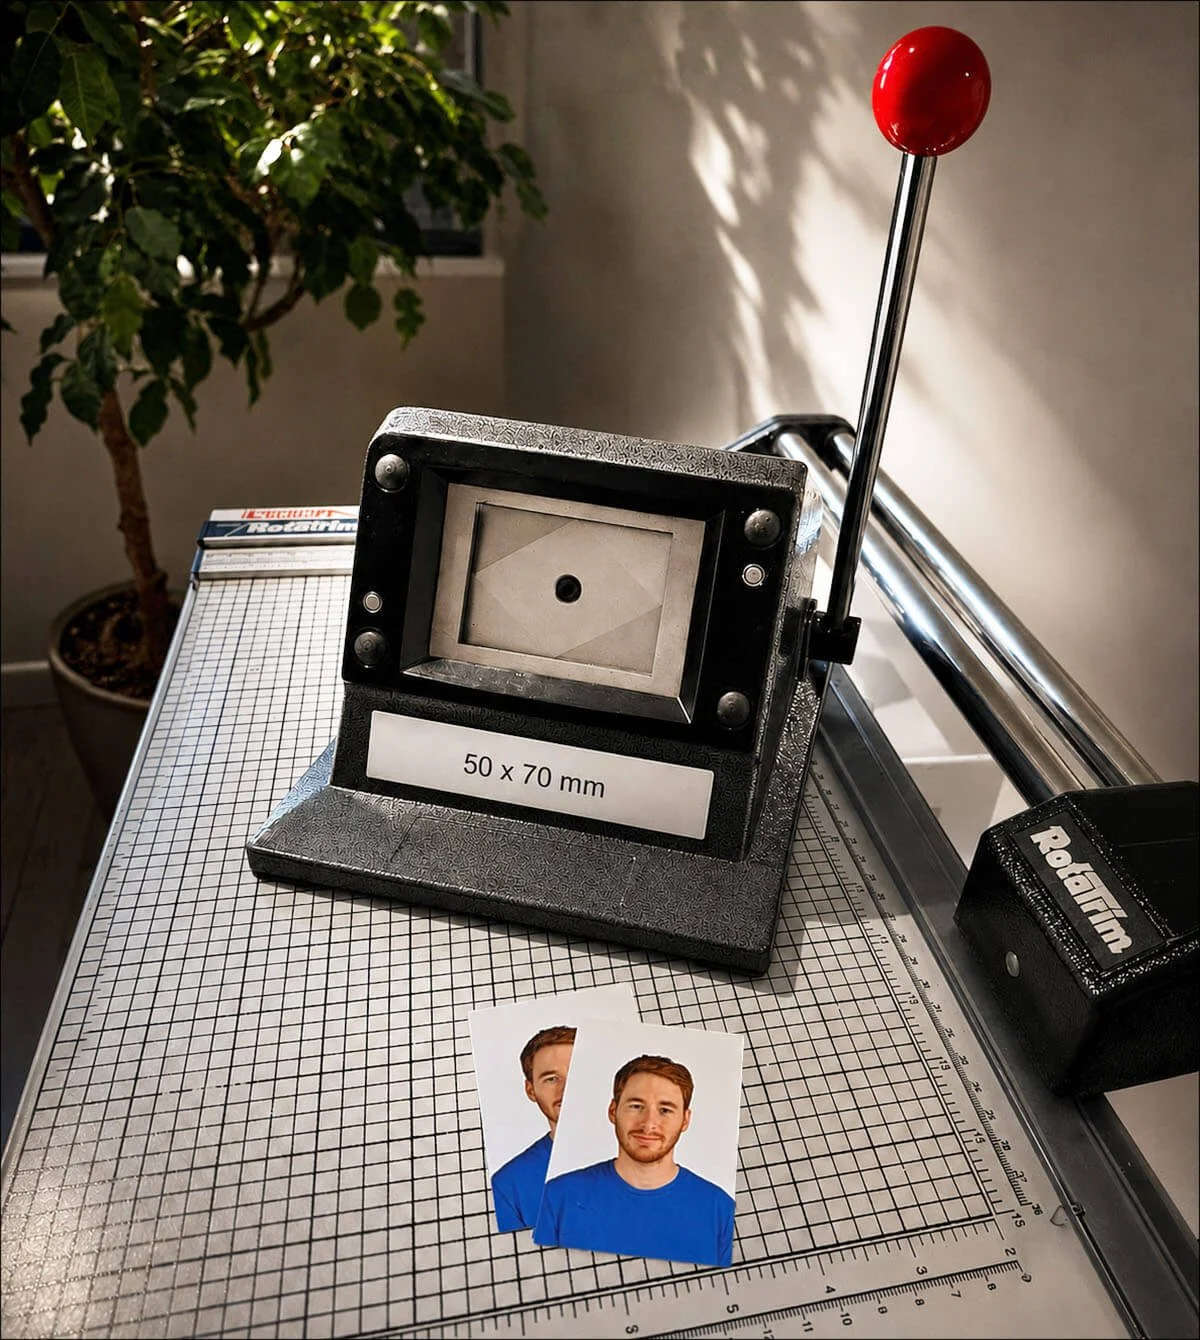
One applicant came to us after being rejected three separate times. Each time, the photo had been hand-cut at a different location, and each time, the cut size was off — not by much, but citizenship and passport photo specifications don't leave room for "close enough." A photograph outside the required measurements can cause an application to be returned or refused.
By the third rejection, she was understandably anxious about the process. The fix wasn't a different photo — it was a precisely calibrated cut, to the exact specification, with no manual guesswork involved.
The lesson: citizenship and passport photos are measured to the millimeter, and machine-precision cutting isn't a luxury — it protects you from exactly this kind of repeat rejection.
Citizenship & Passport: The Ink That Never Actually Dries
A lot of applicants don't realize that the stamp and signature on the back of a citizenship or passport photo can be a rejection risk all on its own — not because of what's written, but because of what it's written with.
Photo paper is resin-coated, and ordinary ballpoint pen ink doesn't fully cure or set on that surface the way it does on regular paper. It can stay smearable indefinitely — weeks or months later, a stack of photos, an envelope, or even light pressure can transfer ink from one photo onto the next, or smudge the writing until it's illegible. Drugstore and shipping-counter photo services typically hand you a regular ballpoint pen for this step, with no way of knowing it's the wrong tool for the job. Search social media and you'll find photo examples of exactly this: applications rejected because the required back-of-photo information smeared or became unreadable.
We use a specialized permanent dry ink made specifically for the back of photographic paper — not a ballpoint pen — which is why this has never been an issue with a photo from our studio.
The lesson: IRCC requires the back-of-photo information to stay clear and legible — it doesn't specify what to write with, but a regular pen on resin-coated paper is a real, avoidable smearing risk that can sit dormant until the moment it matters.
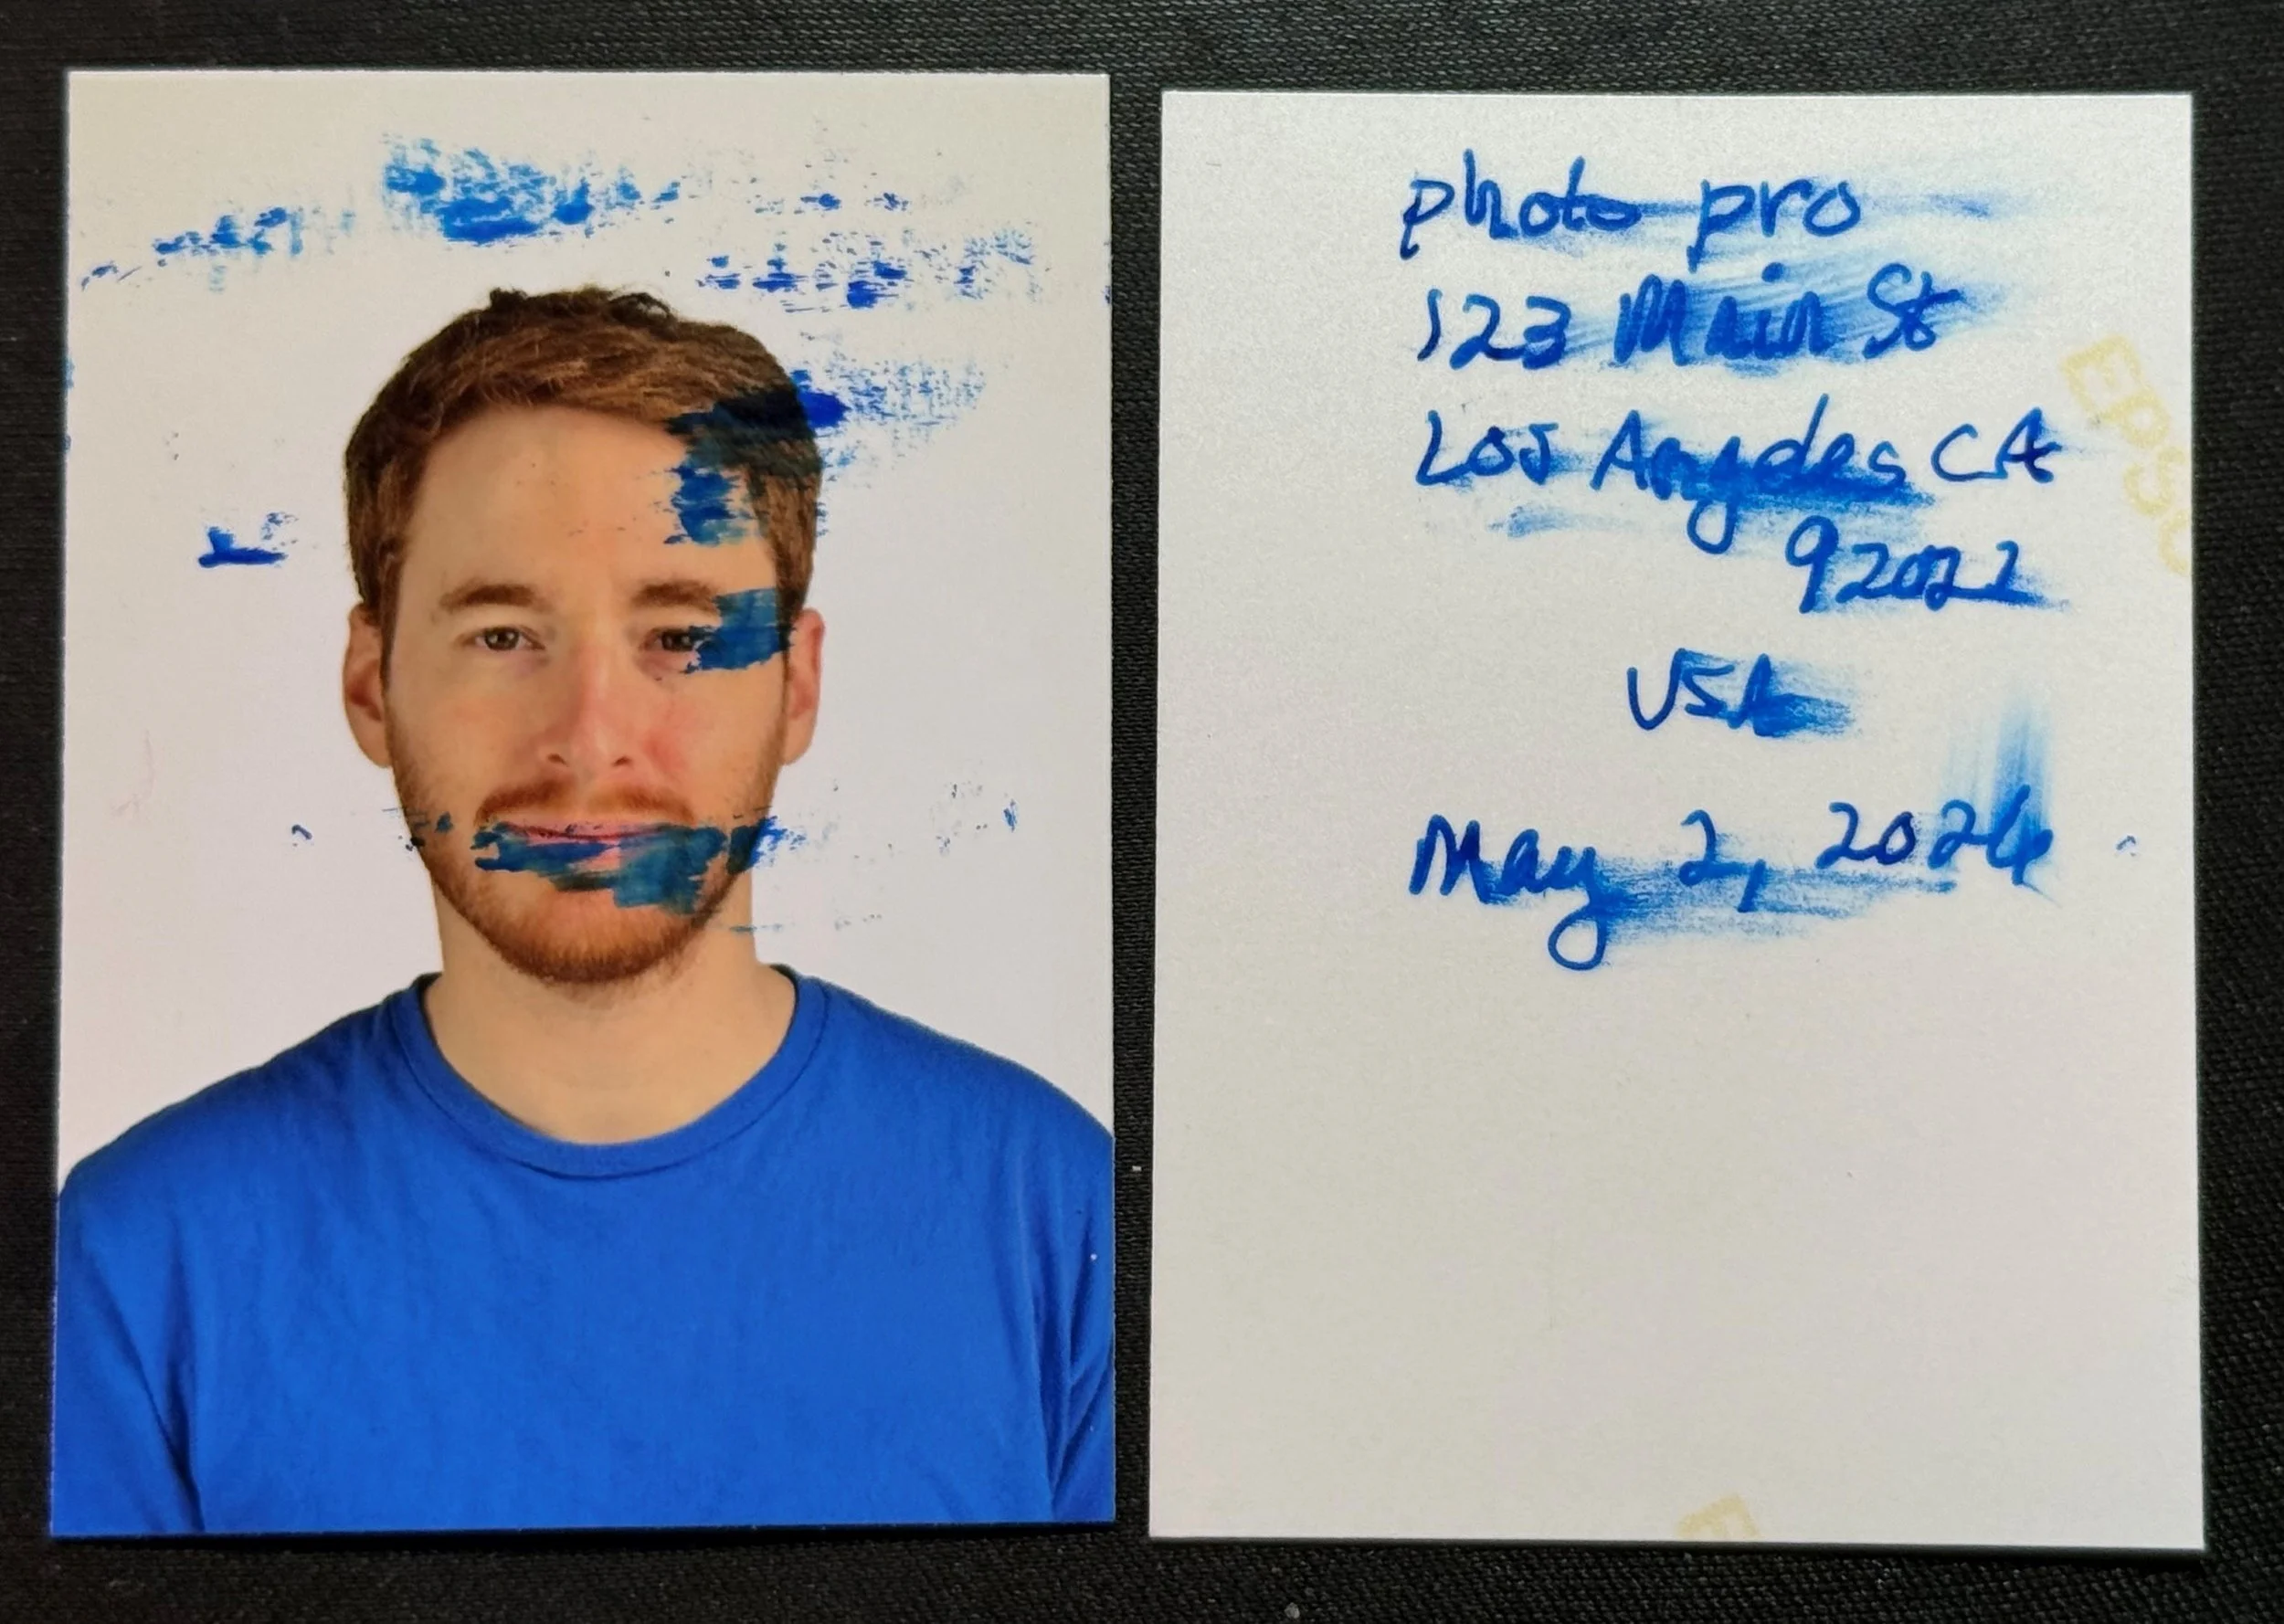
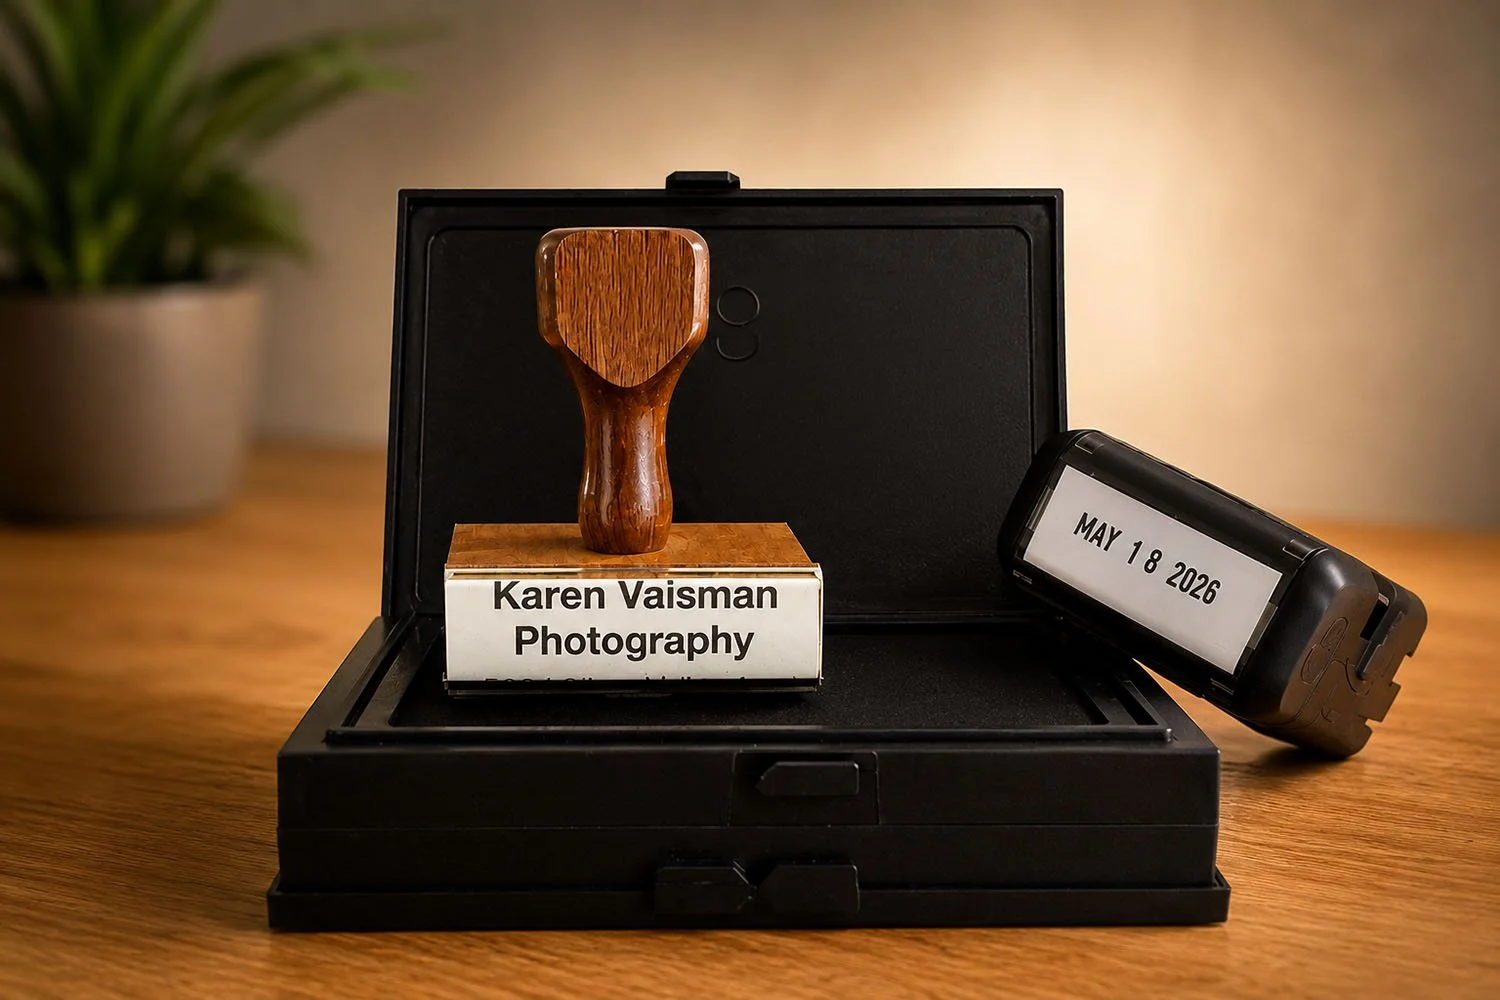
Karen Vaisman uses smear-free permanent ink made specifically for resin-coated photo paper to remove any chance of smearing.
Citizenship & Passport: Green Skin, Wall Shadows, and Why the Camera (and the Light) Matters
Applicants regularly show us photos taken at drugstores and shipping counters — a phone camera, a stand-against-the-wall pose, and whatever lighting happens to be overhead. Two separate problems show up again and again. First, standing too close to the wall lets the ear cast a visible shadow onto the wall directly behind the head — an easy rejection reason on its own. Second, and unrelated, fluorescent overhead lighting throws off the color entirely, giving skin a green or yellow cast that a phone camera won't correct for.
The lesson: citizenship and passport specs aren't just about size and background — they're about proper distance from the backdrop and color-accurate lighting, neither of which a phone camera under drugstore lighting is set up to deliver.
We had a Canadian passport rejected that we had done at FedEx due to a shadow on my face. We could not see a shadow whatsoever but needed a new one done ASAP. Karen got me into her studio that same day and had the photos processed in 35 minutes with the correct stamp for the Canadian passport. She was excellent. We strongly recommend her work.
Citizenship & Passport: Why Posing and Lighting Precision Actually Matters
The government's own guidelines show side-by-side examples of what gets accepted and what gets rejected — you can see the official comparison photos on Canada's Examples of Acceptable and Unacceptable Passport Photos page: https://www.canada.ca/en/immigration-refugees-citizenship/services/canadian-passports/photos.html#examples. A lot of it comes down to precision that's easy to underestimate.
Your face needs to sit correctly within the frame — chin-to-crown between 31mm and 36mm, with your face and shoulders centered and squared to the camera, not tilted in any direction. A visibly tilted or off-center pose can make a photograph unacceptable. That's a hard thing to self-correct for in a quick counter photo, since most people don't naturally notice a slight tilt in themselves.
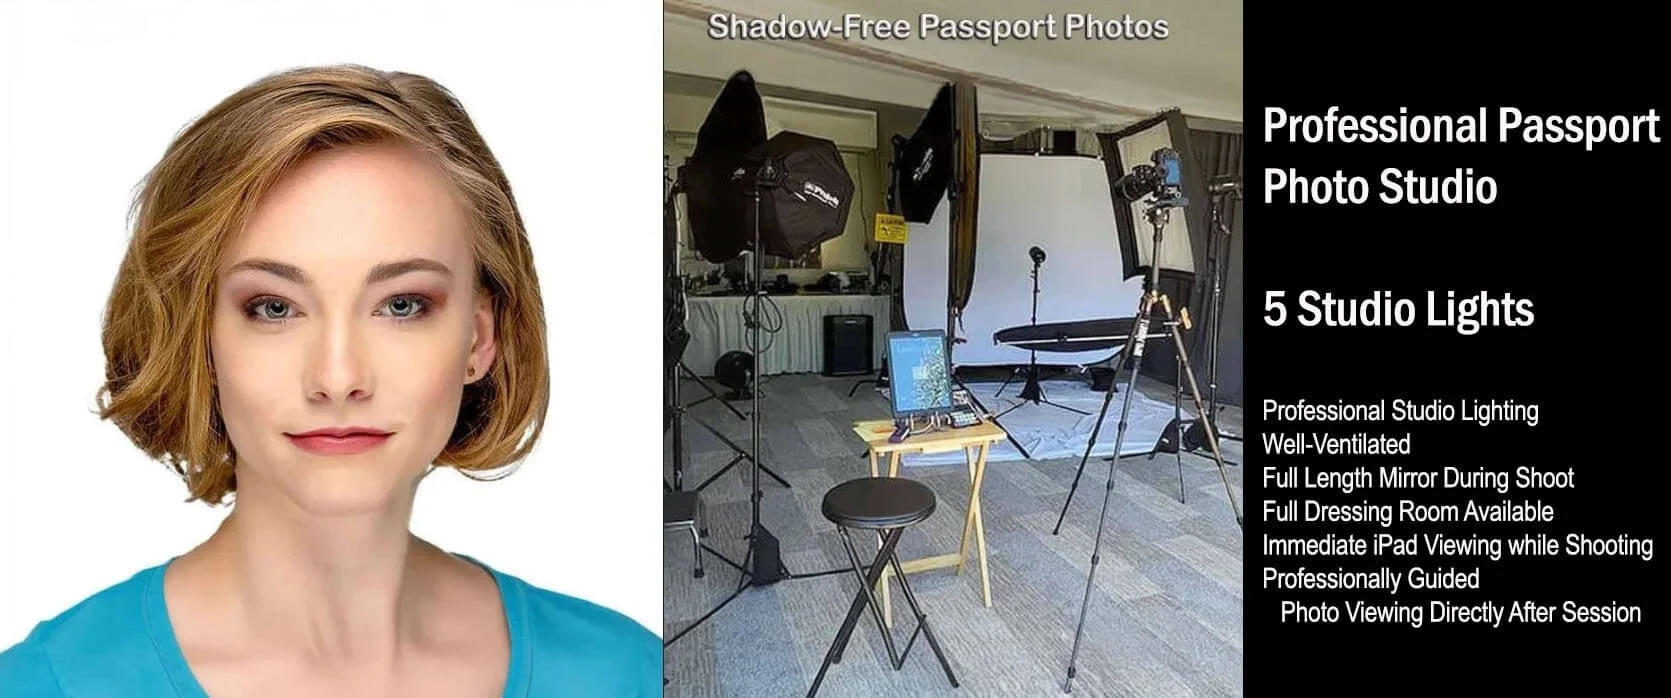
Lighting is the other half of it. We use five studio lights specifically to eliminate shadows entirely — not just on the face, but on the background behind it too, since shadowing on the background is its own separate rejection reason under the official guidelines. A single on-camera flash or a fluorescent ceiling light, the kind most retail counters rely on, physically can't produce that kind of even, shadow-free result. It's not a matter of the photographer trying harder — it's a lighting setup most quick-service counters don't have access to at all.
The lesson: posing precision and shadow-free lighting aren't finishing touches — they're specific, checkable requirements IRCC evaluates every photo against, and they're very hard to get right without the right equipment and a trained eye watching for even a slight tilt.
Citizenship & Passport: Why Baby Photos Are Their Own Category of Difficult
Baby photos come with requirements that are genuinely hard to meet, even with a cooperative subject. The head can't be turned, even slightly — it has to point directly at the camera, and no hands (including a parent's) can appear in frame. For passport photos specifically, IRCC allows some flexibility on a newborn's expression, since a perfectly neutral face isn't realistic at that age — positioning and visibility still have to be exact either way. And unlike an adult photo, none of it can be coached with a word; it has to be caught.
One mother came to us under real time pressure. She'd come in for her own citizenship photos, only to realize she couldn't leave the country without her baby's photo done too — and she needed to travel soon. We had to get the baby's pose exactly right — head straight, eyes open, no hands from mom visible anywhere in frame — knowing a rejected photo would mean starting over and delaying her trip further. It took patience and real technique to get it right the first time, but it worked.
The lesson: baby photos aren't a smaller, cuter version of an adult photo. The same strict rules apply — no turned head, no hands in frame, eyes open — with none of the ability to ask the subject to hold still or look a certain way. It takes real technique, and it takes longer than people expect.
Citizenship & Passport: The Glasses Risk Most People Don't Think About
Glasses are technically allowed in Canadian passport and citizenship photos — but only if your eyes are clearly visible and there's no glare on the lenses. Tinted lenses or sunglasses are never accepted, even if your eyes are visible through them. Glare is a common, easy-to-miss problem: it depends on the exact angle of the lighting relative to the lenses, and a lot of setups simply aren't controlled enough to guarantee it won't happen.
Because of that, we tell every glasses-wearing client to take them off for the photo. It removes the risk entirely rather than hoping the lighting cooperates.
The lesson: glasses aren't automatically disqualifying, but the margin for error is small. Taking them off is the simplest way to guarantee it's never the reason your photo comes back.
Citizenship & Passport: Head Size Measured to the Millimeter — Babies Included
The government's specification is exact: the face, measured from chin to the crown of the head, must fall between 31mm and 36mm. Not "about right" — within that specific range, and it's checked. This applies to everyone, including babies, where getting an accurate, precise measurement is its own challenge given how much harder it is to keep a baby's head still and positioned consistently.
We measure every client's head size to the millimeter before a photo is finalized, babies included, rather than estimating by eye. Large retail photo counters typically aren't set up to do this kind of precise measurement at all — the size compliance is often left to chance.
The lesson: head size isn't a guideline, it's a hard 31–36mm range that gets checked against your submitted photo. Precise measurement, not a visual estimate, is what keeps a photo from being rejected on size alone.
Citizenship & Passport: Why We Never Retouch a Government Photo
This one might surprise people who know us for retouching work. IRCC's rule is strict and explicit: citizenship and passport photos cannot be altered in any way — no brightness or contrast correction, no smoothing, no removing a blemish or shadow, no filters, no AI enhancement of any kind. The photo has to be exactly what the camera captured.
As a Master Retouch Artist, that's worth saying plainly: retouching is something we offer for portraits and headshots, never for a government ID photo. A citizenship or passport photo from our studio is always the unaltered original — correctly lit and precisely composed from the start, so it doesn't need correction after the fact.
The lesson: if a photo studio offers to "clean up" your citizenship or passport photo, that's not a bonus — it's a rejection risk. The right fix is getting the lighting and pose correct in camera, not editing it afterward.
The Short Version: A Citizenship & Passport Photo Checklist
- Confirm the back-of-photo stamp requirement applies to your passport photo — it does, regardless of age
- For paper citizenship applications, confirm the back of the photo includes your own name, not just the photographer's information
- Know whether you're applying online (digital photo only) or by mail/in person (printed photos only) — you never need both formats, and citizenship and passport have separate digital specs, so confirm which one applies to you
- Verify your photo is cut to the exact millimeter specification, not "close enough"
- Make sure the back-of-photo writing is done in permanent ink made for photo paper, not a regular ballpoint pen — ballpoint ink on resin-coated paper can smear indefinitely
- Double-check every signature field on your application, not just the photo
- Avoid phone-camera photos taken too close to a wall or under fluorescent lighting
- Make sure your face and shoulders are centered and squared to the camera, not tilted — even a slight lean can affect whether it's accepted
- Confirm there are no shadows on your face or on the background behind you — check the official examples page for what reviewers are looking for
- If you're photographing a baby: head must point straight at the camera with no turn, and no hands (including a parent's) can be visible in frame — for passport photos, IRCC allows some flexibility on a newborn's expression, but positioning still has to be exact
- Take glasses off if you can — they're technically allowed if eyes are clearly visible with no glare, but tinted lenses are never accepted and glare is an easy, avoidable risk
- Confirm your head size measures between 31mm and 36mm from chin to crown — this is checked precisely, not estimated, and applies to babies too
- Never let a photo studio "clean up" or retouch your citizenship or passport photo — any alteration, even minor color correction, is grounds for rejection
- When in doubt, get a second opinion before you submit — a resubmission costs more time than getting it right the first time
Where to Get Canadian Passport and Citizenship Photos Near You
We're based in Agoura Hills, just off the 101 Freeway, serving clients throughout Los Angeles County and Ventura County — including Thousand Oaks, Westlake Village, and Calabasas. Sessions are by appointment only, and most photos are ready within an hour. Visit our Canadian Passport & Citizenship page for our full range of Canadian services, or go directly to Canadian Passport Photos or Canadian Citizenship Photos.
Why This Keeps Happening
Most of these mistakes don't happen because applicants aren't careful. They happen because the person taking the photo — at a drugstore, a shipping counter, or a big-box store — isn't trained on the specific, exacting requirements Canadian citizenship and passport photos share, which are stricter and more precise than what most quick-service counters are set up to deliver. For the complete citizenship specifications, see our Canadian Citizenship Photo Requirements guide; for passport-specific details, see our Canadian Passport Photo Requirements guide. Requirements in this post were reviewed against the official Immigration, Refugees and Citizenship Canada (IRCC) citizenship photo specifications and passport photo specifications as of July 2026. IRCC updates its specifications periodically, and requirements can vary by application type and procedure — always confirm the current instructions in your own application account or package before your appointment. Whatever your specific application requires, that's what we follow, even if it differs from what's described above.
Agoura Hills Photography Studio
Serving Los Angeles & Ventura County
Call
(818) 991-7787
Karen answers her own phone
Book Your Canadian Photo Appointment →FAQs
Q: What's the most common reason Canadian passport and citizenship photos get rejected?
A: Shadows — either on the face or on the background — are one of the top rejection causes, along with incorrect head size, missing or smeared back-of-photo information, and improper posing. Most of these stem from lighting and equipment that quick-service counters simply aren't set up to control.
Q: Do I need a printed photo or a digital photo?
A: That depends on your application — and Canada suggests covering both. On its online renewal page canada.ca says: “It's a good idea to get both a digital and a printed photo. This will give you the flexibility to apply online, by mail or in person.” We supply prints, a digital file, or both: prints come as two identical photos with our commercial studio stamp on one, and a digital order is a JPG sized and cropped to spec with a text file carrying our studio name, address and the date the photo was taken. Citizenship and passport digital specs differ, so book the option your application asks for.
Q: Can I write on the back of my photo with a regular pen?
A: You can, but it's risky. Ordinary ballpoint ink doesn't fully cure on resin-coated photo paper, so it can stay smearable for weeks or months — and a smeared back is a rejection nobody sees coming. Our stamp goes on in permanent ink made for photo paper, and if you need to write anything yourself, ask us for a permanent-ink photo pen.
Q: What information needs to be on the back of a citizenship photo?
A: We stamp one of your two prints with our commercial studio name, address and the date your photo was taken — that is the studio information we supply. If your form also asks you to add your own name on the back, ask us for a permanent-ink photo pen and write it yourself before you mail it. Check your own application for exactly what it wants there.
Q: Can I wear glasses in my photo?
A: Glasses are allowed only if your eyes are clearly visible with no glare on the lenses. Tinted lenses are never accepted. Many photographers recommend removing glasses entirely to eliminate the risk.
Q: Do Canadian passport and citizenship photos for babies use the same head-size requirements as adult photos?
A: Yes. The 31-36mm chin-to-crown measurement applies, but IRCC allows some flexibility in a newborn's expression. Child photographs must still meet the relevant positioning, background, lighting, and visibility requirements.
Q: Can my citizenship or passport photo be retouched or edited?
A: No. IRCC prohibits any alteration to citizenship and passport photos — including brightness or color correction, retouching, filters, or AI enhancement of any kind. As a Master Retouch Artist, we offer that work for portraits and headshots, but every citizenship and passport photo from our studio is always the unaltered original.
Agoura Hills Photography Studio
Serving Los Angeles & Ventura County
Call (818) 991-7787
Karen answers her own phone
Book Your Canadian Photo Appointment →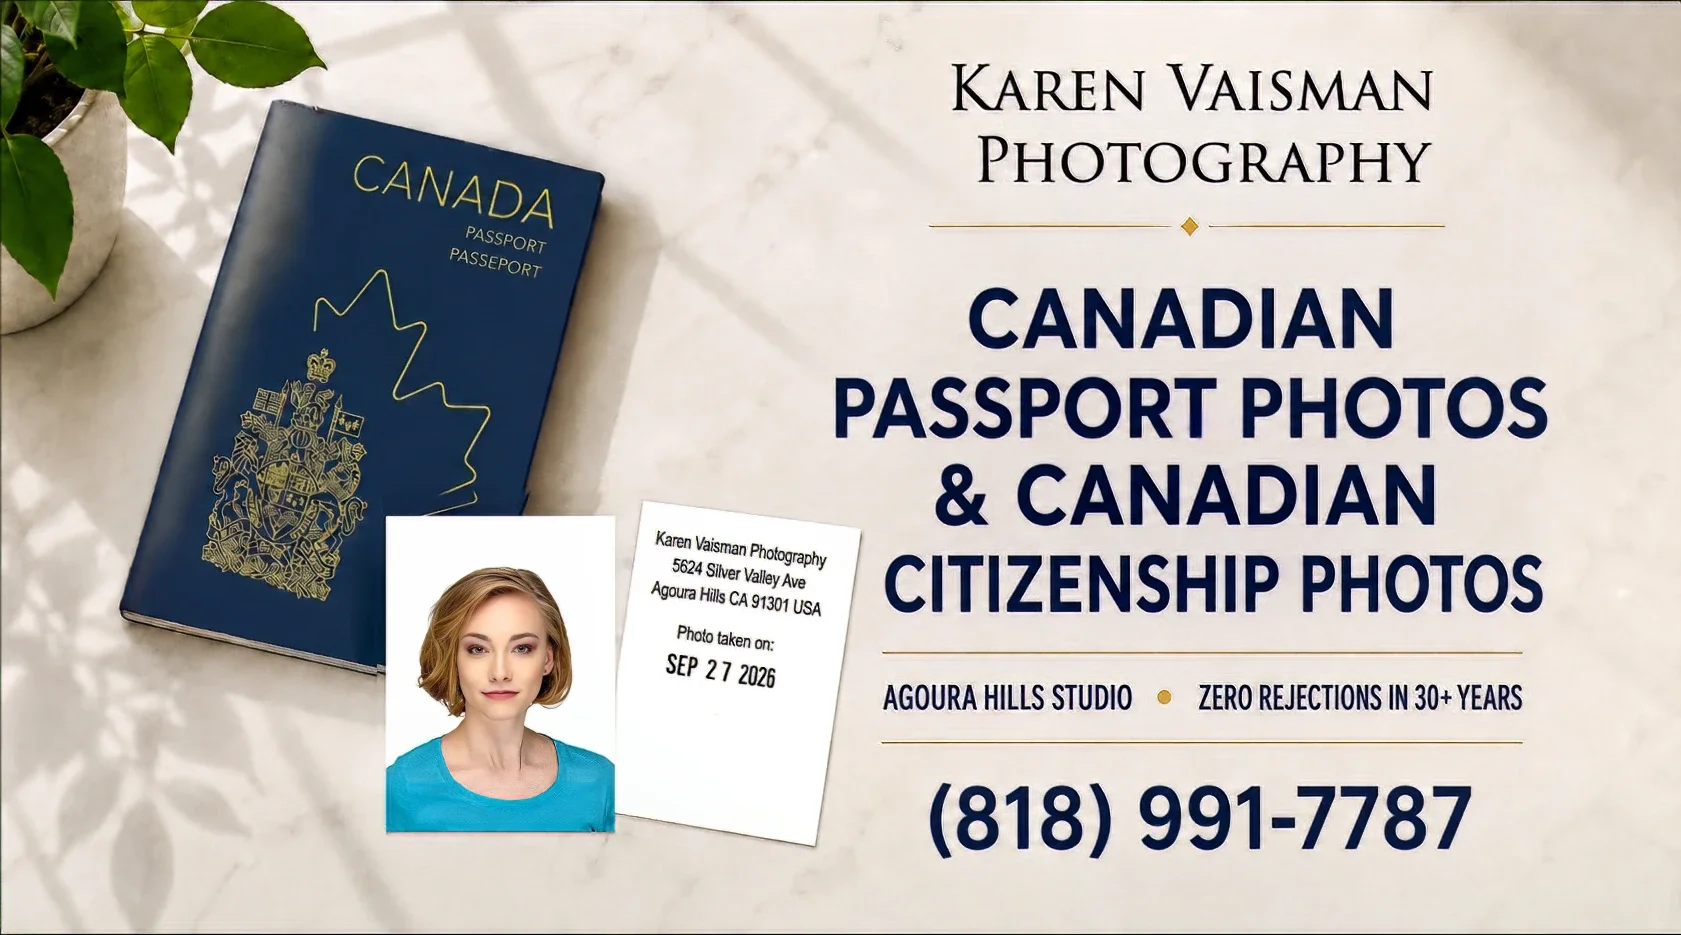

Karen Vaisman
About The Author
I'm Karen Vaisman, an award-winning photographer and Master Retouch Artist based in Agoura Hills, and a listed referral resource for the Embassy of Canada. In 30+ years of photographing Canadian citizenship and passport applicants, I've never had a photo rejected — because I know exactly what the specifications require, down to the millimeter. Have a question about your own photo before you book? Let's connect!
Why Choose Karen Vaisman For Your Canadian Passport or Citizenship Photo?
A rejected photo doesn't just cost you a reprint — it costs you weeks or months of delay on an application that already takes time. As your Canadian passport and citizenship photo specialist, I know the exact specifications IRCC checks for: precise head measurements, shadow-free studio lighting, and permanent ink that won’t smear. That's the standard behind a zero-rejection record spanning three decades.